Weld Size Does Not Meet The Specification Requirements
Weld Size Does Not Meet The Specification Requirements
The quality defects existing in the welding project mainly include the following aspects: defects that can be seen by the naked eye or low magnification magnifying glass and located on the surface of the weld, such as undercut (biting), weld bead, crater, surface vent, clip Slag, surface cracks, unreasonable weld position, etc. are called external defects and must be discovered by destructive tests or special non-destructive testing methods. Internal pores, slag inclusions, internal cracks, incomplete penetration, unmelted, etc. are called internal defect. However, it is common to not clean the welding slag and spatter after welding and the welding dies that are not cleaned.

Weld size does not meet the specification requirements
The welding process is related to the welding method and other factors. The operation should be determined according to the material, grade, chemical composition, weldment structure type and welding performance requirements of the workpiece to be welded.Welding methods include: tungsten inert gas welding, TIG welding, manual welding, automatic welding, etc.
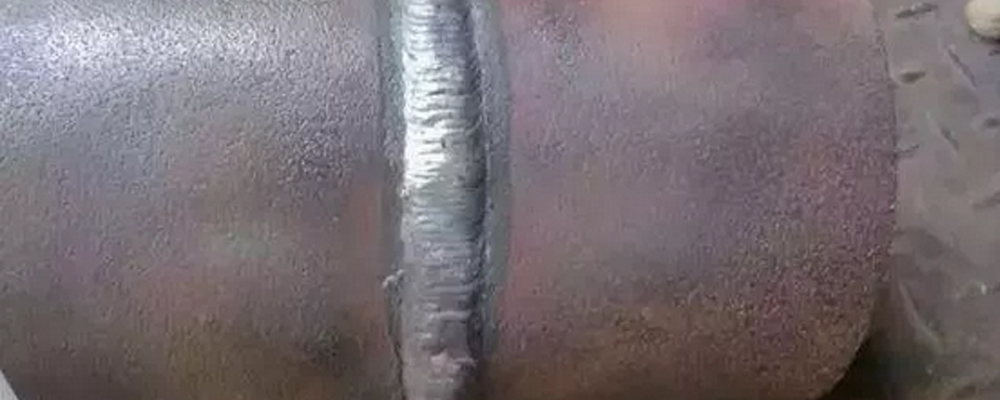
Phenomenon: the height of the weld is too large or too small during the inspection; or the width of the weld is too wide or too narrow, and the transition between the weld and the base metal is not smooth, the surface is rough, the weld is vertical, and the transverse direction It is not neat, and there is too much undercut in the weld at the fillet weld.
Reason: The straightness of the weld bevel is poor, the angle of the groove is not correct, or the size of the assembly gap is not uniform. If the current is too large in the welding, the welding rod is melted too fast, the welding seam is difficult to be formed, and the current is too small. When the arc is welded, the welding rod will cause a "bonding phenomenon", resulting in impervious welding or welding. Welders are not skilled enough to operate, the method of transport is improper, such as too fast or too slow, and the angle of the electrode is not correct. Automatic submerged arc welding process, improper selection of welding process parameters.
Control measures: According to the design requirements and welding specifications, the weld bevel is machined. Mechanical processing is used to make the groove angle and the straightness of the edge of the groove and the straightness of the edge of the groove meet the requirements, avoiding artificial gas cutting and manual shovel. Cut the groove. In the group pairing, the weld gap is ensured to be uniform, which lays a foundation for ensuring the welding quality. The welding process qualification is used to select the appropriate welding process parameters. Welders must be certified, and trained welders have a certain theoretical basis and operational skills. The last layer of welds on the welded surface of the multi-layer weld is to be welded with a small diameter (φ2.0mm~3.0mm) under the condition of ensuring fusion with the bottom layer. The speed of the transport bar is uniform, and it is propelled in a rhythmical manner in the longitudinal direction, and a lateral swing of a certain width can make the surface of the weld be neat and beautiful.
Related Products
Contact Us
Please feel free to let us know your demand information, we will contact you as soon as possible, looking forward to cooperate with you!


